Showing posts with label connect. Show all posts

Friday, February 5, 2010

Setting up the 3Pi Classroom Kit - Part 3

Now that all the components are in place it is time to complete the last installation step.

All 3Pi kits contain a licenced copy of SmoothBoard as it is simply the best available software.
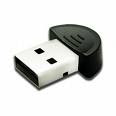
SmoothBoard connects to your computer through standard MicroSoft Bluetooth. As many computers come with another type of Bluetooth (or none at all ) we supply a small USB Bluetooth dongle in our kits. We give instructions on how to disable any preinstalled Bluetooth. After following them, you plug the dongle into any spare USB port and it installs itself using the MS Bluetooth.
Now install SmoothBoard (full instructions given), and start it up. The programme will show a screen like this as it searches for the wiimote.
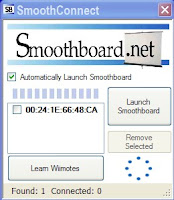
When you see this screen, push our remote synch button in for a couple of seconds and release it. You will see the four blue lights on the end of the wiimote start to flash which shows it is in 'discovery mode'. They will keep flashing for 20 seconds. If your computer is slow, they may stop flashing before the connection is made. If this happens, simply press the button again. SmoothBoard will find the wiimote and connect to it. The first time you do this it may take a little while for the wiimote to be found, but after that it gets much quicker. When it is properly connected you will see this.

Now click on "Quick Calibration". A circle with a cross in it will appear in the top left hand corner of the screen. Take your pen and touch it to the middle of the cross. It will disappear and another one should appear in the next corner. You then repeat the action - there are four in total. If you are unable to make any of the crosses disappear, the wiimote is not pointing in the middle of the screen. Slightly adjust it and try again. When calibrated, you can start interacting!

Wednesday, April 1, 2009

Connecting the Wiimote to a Computer - Part Two

Now that you've established that your computer has Bluetooth, you need to make sure it is enabled. (This is only necessary the first time you use it.)
You'll know if it is, because in the system tray at the bottom right of your computer, there will be an icon that looks like this:

If you don't see it, or the white lines are red, you will have to enable it.
The process to do this varies from computer to computer, and it may be a good idea to use the help function on your computer to find out what to do. However, there will probably be a utility in Control Panels (Windows OS) that will do it.

Once the blue icon is in your system tray you can click it to bring up the Bluetooth options.
Choose 'connect' and follow the steps. If the programme talks about a password or pairing, click 'skip' and continue. Now THE BIG THING - your Bluetooth will only be able to find the wiimote and connect to it if it is in 'discovery mode'. To put a wiimote into this mode you can, a) push buttons 1 & 2 at the same time, b) push the red button inside the battery cover, or c) push the remote synching button in our classroom kit.

You'll know you've put it into this mode because the row of blue lights on the wiimote will start flashing. They will keep flashing for around 20 seconds. If you haven't established the connection by then you will have to push the button(s) again.

When successfully connected, the lights will stop flashing and one will remain on. Also the Bluetooth icon in the system tray will turn green. This is good!


Just to recap:

1. Enable your Bluetooth
2. Open the Bluetooth programme
3. Put your wiimote into discovery mode
4. Push 'connect' in the Bluetooth programme
5. Follow the steps inthe programme (choose 'skip' or 'ignore' if it asks for a pairing
code or password)

Note: If you are not successful, it is likely that the wiimote came out of discovery mode before
you finished connecting. This can happen when you first try the process, but don't worry, it will become second nature after a couple of goes.


Please post a comment if you need any part of this process explained more fully.

Thursday, March 26, 2009

Connecting the Wiimote to a Computer - Part one

This is the first step in using your wiimote to create an interactive whiteboard. It is also the step that seems to cause new users the most difficulty. However, once achieved the first time, takes only a few seconds after that.

As you probably know, the wiimote 'talks' to computers via Bluetooth (a wireless system widely used in devices such as cellphones, microphones, music players, etc). Obviously your computer needs to have Bluetooth installed before you can connect the wiimote. In New Zealand, teacher's laptops come with this feature. If your computer does not, you can add it simply by plugging in a Bluetooth dongle. These small devices plug into a spare usb port. 3Pi have tested a lot of dongles from various manufacturers and the one we supply works with minimal hassle - you simply plug it in, and on Windows XP and Vista computers, it installs itself and is ready to use. It works on Apple Macs as well. There are many other dongles that work too, but our tests show that there are also plenty that do not.

This photo shows the tiny device sticking out from the side of a tablet computer.

We will go over the actual process used to make the connection in a post soon.